K, here it goes:

Giant Book of Mormon Tutorial
Materials:
2 black foam boards (Dollar Tree, $1 each)
2 white foam boards (Dollar Tree, $1 each)
2 black foam boards (Dollar Tree, $1 each)
2 white foam boards (Dollar Tree, $1 each)
2-3 regular white poster board (Dollar Tree, 2/$1)
Gold chalk marker (Got mine at a discount Craft warehouse) Any marker that shows up on black will work. You can even use acrylic paint.
Clear Packaging tape (Dollar Tree, $1)
Black electrical tape (Dollar Tree, $1)
String
Gospel Art Pictures
Watercolors
Pastels
Step 1: Tape the two white foam boards together
Place the two white foam boards next to each other flat on the ground. Tape with clear packaging tape on the seam at 180 degrees.

SIDE NOTE: An easy option would be to do one big pop-up with the entire scene drawn or taped on it.

Step 2: The Pop-Ups: Pyramid, Mountains, and People
Before I cut the regular poster board, I did a mini pop-up book with scratch paper to figure out the mechanics of it all. I learned that every pop-up needs to be aligned on the center crease and the angles from that crease need to be congruent. I’ll try to explain better with pictures.


The Pyramid
This took some experimenting. if it doesn’t quite fit right, just fold the book and then mark where you need to tape or cut the pyramid to make it fold better. Sorry I don’t have specific measurements, but the diagram shows which sides need to be equal lengths to each other. (I’m kind of a math nerd that likes to “eye” things. Oxymoron, I know) The pyramid doesn't have a back, just 3 sides so the mountains can fold into it.


Mountains
Cut any shape and they don’t have to be equal lengths coming from the fold but still congruent angles.

After I taped the Pyramid and Mountains, I watercolored the entire scene/book before I put on the people pop-ups. I did the mountains using black, green, and blue. I did the pyramid blue. Let it dry.
People
Cut out of the Gospel Art book. If they aren’t on card-stock, then glue to card-stock. These will be tied or glued to the center pyramid since they around on the crease. Wherever they are place (somewhere in front of the pyramid), they need to be taped at 90 degrees or perpendicular on the front of the picture and flat or 180 degrees on the backside. The string can be tied on through a pin hole on the people and then the pyramid, Make sure it is tied tight. Some people are taped directly to the front of the Pyramid at 90 degrees. I just taped them and hoped for the best when I closed the book.


I added pastels to try and cover the tape that the watercolor didn’t cover. (I actually was looking on the fridge and found a bag of pastels and was like hey i’ll try this!)
The pastels started to rip the poster board because it was still a little wet, but it added a nice texture - woohoo!


Step 3: Front/Back Cover
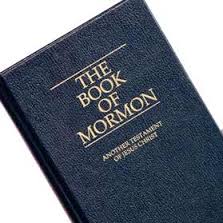
Write “The Book of Mormon”on the front cover in Gold or Silver marker. Draw two lines on the top and bottom of words. I didn't write "Another Testament of Jesus Christ" but that would be good too.
Close the pop-up and tape the cover to the back of the first page at 180 degrees. Do the same with the back cover. Close all foam boards so the spine if facing you and tape it using clear tape. Then I went over it with black electric tape.

Here's some more pictures of the finsihed Book of Mormon!


Good Luck!! And post your Giant Book of Mormon Pop-Up, I'd LOVE to see them!
No comments:
Post a Comment